A Day Inside a Pro Photo Lab: What Happens to a Print Order
Files land, an operator color corrects, paper runs through chemistry, and someone packs a box that has to survive a truck. A walk through a professional lab, and what it wants from your order.
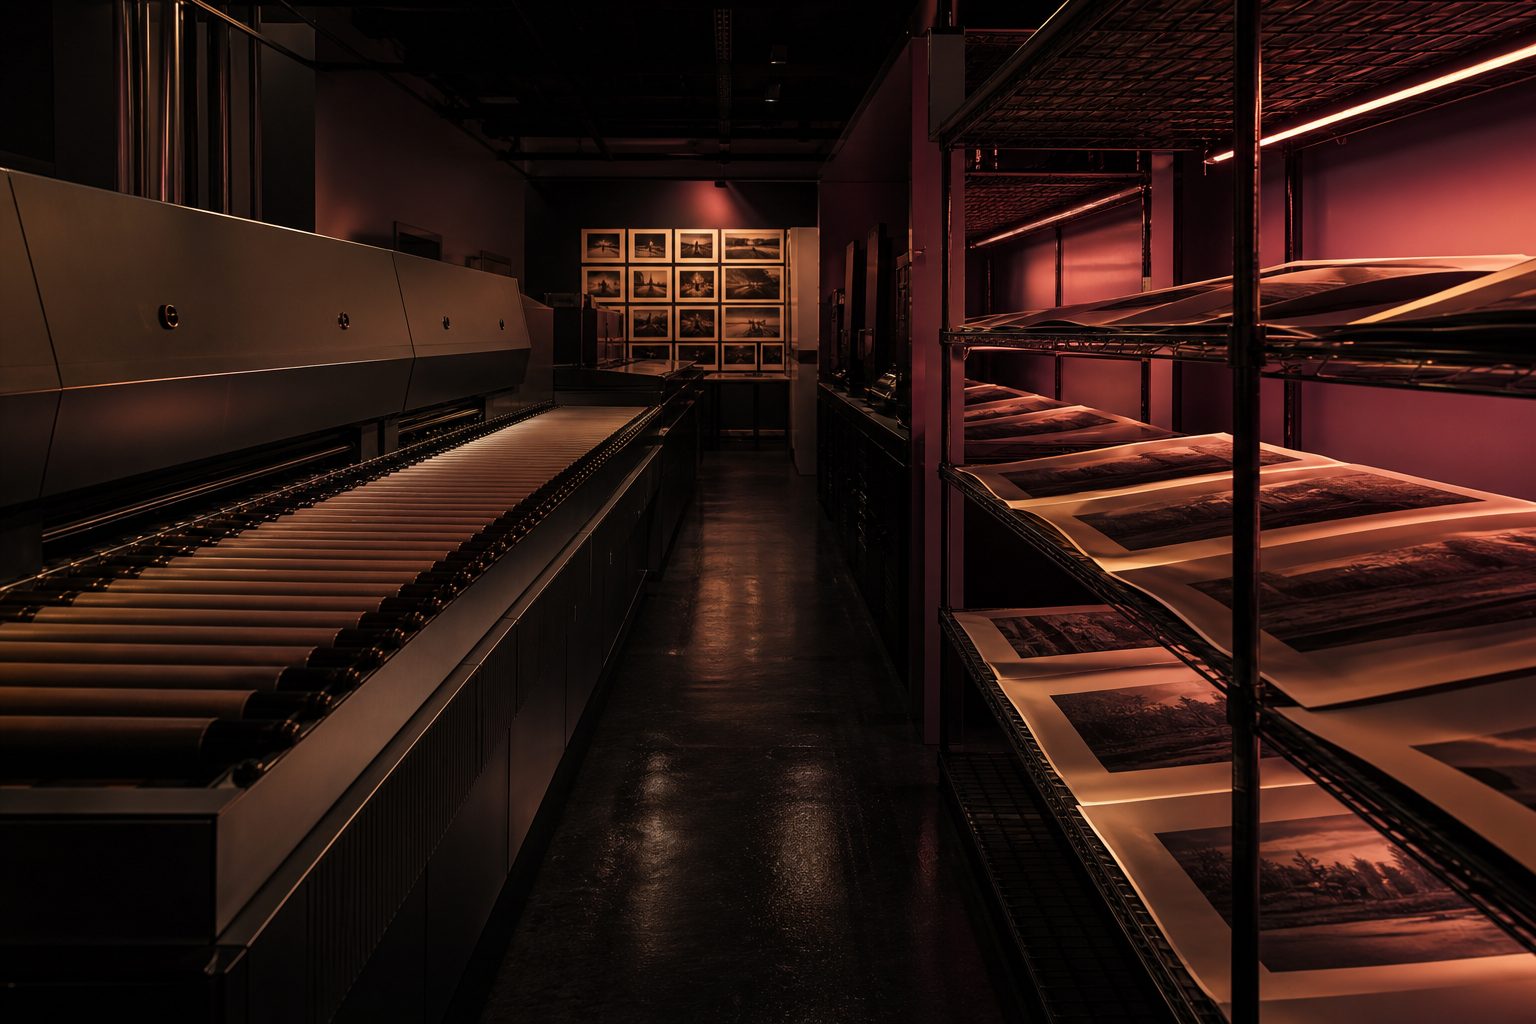
Order intake: how your file, its color profile and its instructions arrive
Every print order begins in the digital inbox. The lab's workflow relies on how you prepare and send your files, what format you use, and whether you include clear instructions. The most common errors start before a technician even opens your folder. Misnamed files, missing crop instructions, or embedded color profiles that don't match the print process all create hurdles.
Labs receive jobs through several channels. Some photographers use direct uploads through the lab's web portal. Others submit orders by email or even FTP, especially for high-volume shoots. Each method requires the operator to confirm the files match the customer's naming conventions and that the requested sizes line up with the lab's print options.
Instructions matter. A note to "print as is" tells the tech not to touch exposure or color, but if you want a specific crop, border, or retouch, it needs to be written somewhere accessible. Most labs prefer a PDF or a text file attached to the order. If you leave this out, the operator will likely call or email you, which adds a day or more to your turnaround.
Color profiles are another pain point. Labs that run on silver halide machines expect files in sRGB or Adobe RGB. If your file comes in ProPhoto or another wide-gamut profile, the color might look wrong out of the printer. Some labs convert automatically, but others will reach out for clarification. Including a color profile in your file metadata helps, but sending a soft proof or reference print is even better when color is critical.
Keep reading: How to Register a Year of Portrait Work With the Copyright Office
The color correction desk and what an operator will change
Once your files pass intake, they land on a color correction workstation. Here, a trained technician reviews every image on a calibrated monitor under consistent lighting. Their main goal is to ensure the print matches what most clients would expect to see on paper.
Adjustments: What gets fixed and what stays
Operators check exposure, white balance, and contrast first. If a file is too dark, has a color cast, or lacks detail in the highlights or shadows, the technician may make subtle adjustments. They can correct skin tones, bring back texture in a blown-out sky, or neutralize a green background. If the client requested "no edits," the file runs straight to the print queue, but most pros let the lab use its judgment.
Dust spots and blemishes are usually not retouched unless asked. Labs do not open up every file in Photoshop for heavy edits. They may, however, crop to fit the print size or add white borders if specified. If a lab technician finds a major issue, like a missing file or a corrupt image, they will contact you before moving forward.
Reference prints and communication
Some photographers send a reference print or a test strip to guide the operator. This is common when color matching for a repeat client or when the job needs to match previous prints. Labs appreciate clear communication; knowing your expectation helps the tech avoid guesswork and reprints.
Silver halide exposure, chemistry and the dry to dry line
With files corrected and queued, the next stop is the print room. Most professional labs still use silver halide printers for photo paper. These machines use LED or laser light to expose the image onto light-sensitive paper. The exposed paper then moves through a wet chemical process that develops and fixes the image.
Printing: From digital to paper
The operator loads the paper roll into the printer, sets the print size, and sends the digital file to the machine. The exposure process takes just seconds per print. Printers check for paper jams or misfeeds before a run starts. Once exposed, the prints pass through a series of rollers that guide them into chemical tanks.
The "dry to dry" line means prints enter the process dry, run through developer, bleach-fix, and water baths, then emerge dry and ready for handling. The total journey through the machine takes about five to ten minutes, depending on print size and chemistry temperature.
Paper types and surface finishes
Labs stock several types of photo paper: glossy, lustre, matte, and sometimes metallic. The operator selects the right roll for your order based on the intake instructions. Each surface reacts slightly differently to the chemistry, which affects color and contrast. For this reason, labs run regular quality checks on every paper type in use.
Keep reading: Lustre, Deep Matte or Metallic: Picking Lab Paper for Portraits
Density checks, control strips and the calibration schedule
Maintaining consistent print quality is the job of the lab's calibration routine. Operators run density checks daily, comparing prints to a known reference standard. Control strips, small test prints with a full range of colors and tones, go through the machine at the start of each day and after every chemistry change.
A densitometer measures these strips, checking that blacks are rich, whites are clean, and every color falls within a tight tolerance. If the readings drift out of spec, the technician adjusts exposure times, chemistry mix, or paper settings. This process keeps your prints consistent from day to day, even across different print runs.
Calibration: Scheduled maintenance
Labs set a strict calibration schedule. Most recalibrate after each batch of new chemistry, after a certain number of prints, or at the beginning of every shift. Some labs hang reference prints in the work area so technicians can spot shifts at a glance. Calibration logs are kept for every machine. If there's ever a question about a print, the lab can trace back to the exact chemistry and settings used.
Mounting, laminating and framing on the same floor
After printing, some orders call for finishing services. Mounting, laminating, and framing are often handled in the same building as printing, especially in labs with a full-service offering. This saves time and reduces the risk of damage in transit between departments.
Mounting attaches the print to a rigid board, usually foam, gator, or masonite. The operator uses a vacuum press or adhesive roller to bond the print to the substrate. If the client requests lamination, the print runs through a heated roller with a clear protective film. This helps resist fingerprints, moisture, and minor scratches.
Framing is a specialist task. Some labs have a dedicated framing room with miter saws, underpinners, and glass cutters. Frames are built to size, and the print is mounted and glazed according to the order. Mats, spacers, and dust covers are added as requested. Every finished piece is inspected for debris or marks before it moves to packing.
The more finishing steps your order requires, the more time it will spend in the lab. Detailed instructions at intake help the lab schedule each step and avoid bottlenecks.
See how ProofRoom handles this for photography
Cutting, packing and why boxes fail in transit
Final assembly happens at the packing table. Here, prints are trimmed to final size with guillotine cutters or rotary trimmers. For mounted or framed pieces, operators check corners and edges for chips or loose material before wrapping.
Packing is a craft. Lab workers use glassine, tissue, or polyethylene sleeves to protect the print surface. Larger prints are rolled around a core and wrapped with kraft paper. Mounted or framed prints get corner protectors and bubble wrap. Everything is boxed up in double-walled corrugate or custom cartons, depending on size and weight.
Why boxes fail
Most shipping damage comes from impact, stacking, or shifting inside the box. If a print is free to move, it can scuff or bend against the sides. Poorly sealed boxes can pop open on conveyor belts. Humidity and temperature swings can warp mounts or frames if the packaging isn't tight enough.
Some labs test their packing by dropping boxes or stacking them under weight. Still, no system is perfect. Shipping carriers are rough, and even a sturdy box can collapse if wet or crushed. Labs often keep photos of their packing methods to help with claims when something arrives damaged.
Reprints: who pays, and what evidence the lab asks for
When a print arrives damaged or off-color, the question of who pays for a reprint depends on the cause. Labs typically cover mistakes on their end: wrong crop, poor color, or a packing failure. If the issue traces back to the file, like an uncalibrated monitor, a low-resolution image, or missing instructions, the cost may fall to the photographer.
Labs ask for evidence before authorizing a reprint. This often means emailed photos of the print, the packaging, and any visible damage. For color issues, a side-by-side shot with the reference print helps. If there's a dispute about exposure or color, the lab may offer to adjust and reprint at a discount, especially for regular clients.
Turnaround on reprints is usually faster than the original job, but shipping time still applies. Clear communication and prompt evidence speed up the process for everyone.
What to send so nobody has to touch your file at all
Labs prefer orders that arrive ready for print, with no need for operator intervention. A perfect order includes files at final print resolution, flattened to avoid font or layer issues, and in a standard color space like sRGB or Adobe RGB. Each file should be named to match the order form and include clear cropping or border instructions.
Sending a soft proof or a reference JPEG with your order helps the operator see your intent. Embedding the correct color profile in your files ensures what you see on your monitor is close to what comes out of the printer. Detailed instructions, ideally in a single text file, reduce the risk of misinterpretation.
Client proofing tools that streamline selection, ordering, and delivery allow your files to arrive with all required details attached. This minimizes manual handling, reduces the chance for error, and speeds up the lab's workflow from intake to final shipment.
Read also
Three more pieces from The Proof Sheet on the craft, the pricing and the paperwork behind a portrait studio.
How to Register a Year of Portrait Work With the Copyright Office
Group registration turns a season of sessions into one filing. Here is what published means for portrait work, which group option fits, and how the three month window protects your damages.
Lustre, Deep Matte or Metallic: Picking Lab Paper for Portraits
Paper surface decides how skin, hair and black clothing render on a wall. A working comparison of lustre, deep matte and metallic stocks, with the room conditions that make each one succeed or fail.
Cropping Mistakes That Ruin Wall Portraits at 16x20 and Up
Most cropping damage happens before the shutter fires. Here are the framing, aspect ratio and resolution errors that appear only after a client orders big, and how to shoot so they never do.